
📦Unboxing & Initial Setup — Reencle Indoor PlanterUpdated a month ago
⬜ What's in the Box
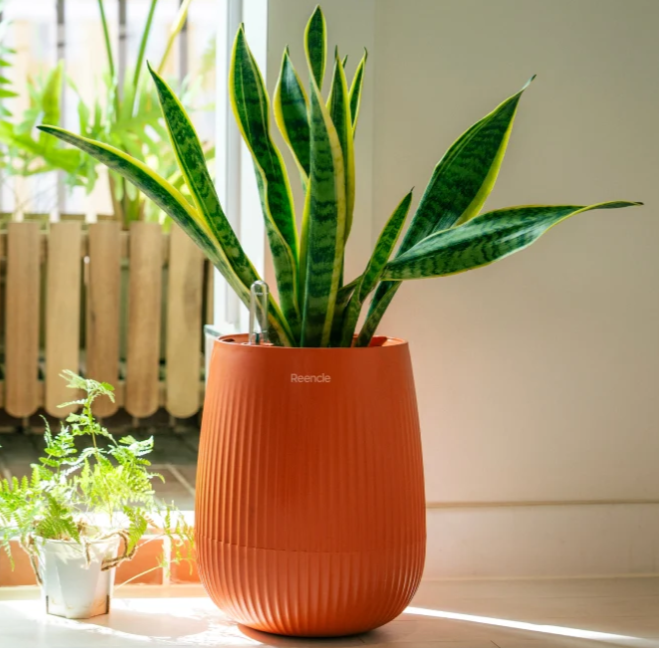
| Component | Description |
|---|---|
| 🪴 Planter Pot (Upper Pot + Lower Pot) | The main planter body |
| 📏 Water Gauge | Indicates the water level in the Lower Pot |
📦 Note: Your unit ships fully assembled. The parts breakdown and steps below are for reference, or in case parts became detached during shipping. |
⬜ Parts & Components
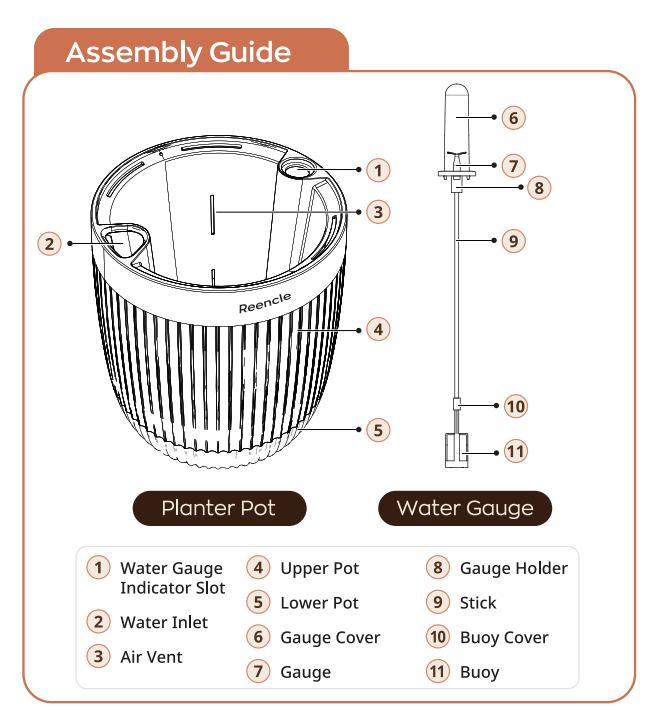
🔶 Planter Pot
# | Part Name | Function |
|---|---|---|
① | Water Gauge Indicator Slot | Holds the Water Gauge in place |
② | Water Inlet | Opening used to add water to the Lower Pot |
③ | Air Vent | Allows airflow around the root area to help manage moisture |
④ | Upper Pot | Plant Zone — where your plant sits and grows |
⑤ | Lower Pot | Water Tank — stores water for the self-watering system |
🔶 Water Gauge
# | Part Name | Function |
|---|---|---|
⑥ | Gauge Cover | Protective cap at the top of the Water Gauge |
⑦ | Gauge | Clear tube that displays the current water level |
⑧ | Gauge Holder | Secures the Water Gauge to the planter |
⑨ | Stick | Connects the Gauge Cover to the Buoy |
⑩ | Buoy Cover | Housing for the floating Buoy mechanism |
⑪ | Buoy | Floats on the water level to Gauge indicator |
◻ Unboxing Checklist
Planter Pot (Upper Pot + Lower Pot, pre-assembled)
Water Gauge assembly
No visible damage from shipping
If the Water Gauge or Upper/Lower Pot came detached, follow the assembly steps below
Step 1 — Install the Water Gauge
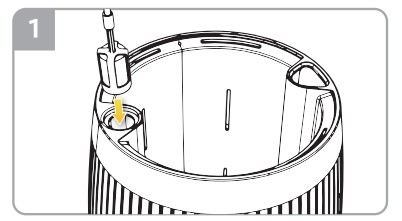
- Insert the water level indicator into the Water Gauge Indicator Slot (①), starting with the float end (⑪ Buoy), until the connector section enters.

2. Push it in until the connector touches the planter body.

3. Once fully seated, secure it firmly so it fits snugly in place.
| ⚠Do not force the Water Gauge into place. If it does not fit properly or appears damaged, please contact Reencle Customer Support "[email protected]" for assistance. |
Step 2 — Connect the Upper and Lower Pots
| Part | Function |
|---|---|
| Upper Pot (④) | Plant Zone — designed to support drainage and airflow around the plant's roots |
| Lower Pot (⑤) | Water Tank — stores water for the self-watering system. The wick draws water upward to supply moisture to the plant. One fill typically lasts 15–30 days, depending on the plant type and environment. |

- Align the Upper Pot (④) with the Lower Pot (⑤)..
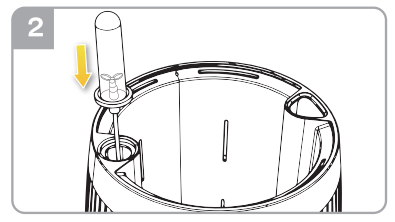
2. Press the Upper Pot down firmly until you hear a click, indicating that the two parts are securely connected.
3. Check that the Upper and Lower Pots are properly aligned and do not feel loose.
Step 3 — Fill with Water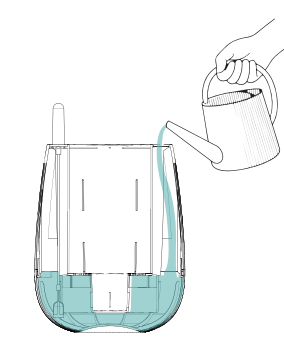
- Add water to the Lower Pot (⑤) through the Water Inlet (②).
- Fill until the Water Gauge reaches the MAX line.
- Check the water level using the Gauge (⑦).

| Gauge Reading | What to do |
|---|---|
| ❌ Below MIN | Add water |
| ✅ At or near MAX | The water tank is full |
| ⚠ Do not fill above the MAX line. If the Water Gauge or any part of the planter feels loose, does not fit properly, or became damaged during shipping, please contact Reencle Customer Support before making any modifications. |
Related Articles
👉 Getting to Know Your Reencle Indoor Planter — Self-Watering System
👉 Getting to Know Your Reencle Indoor Planter — Specs & Repotting